Showing posts with label Tutorials. Show all posts

Sunday, 17 August 2014

Our Family Favourite Mum's Orange or Strawberry Airy Fairy Pudding

My Mum used to make this a lot and called it Airy Fairy Pudding
Sometimes she made it with Strawberries instead of Mandarins
The only 3 ingredients she used 
1 Tin of Mandarin oranges ( or Strawberries ) in Juice
1 Orange ( or Strawberry ) flavoured Jelly
Evaporated Milk
METHOD FOR ORANGE
Drain Mandarins reserving some whole pieces for decoration
Dissolve one packet of Jelly cubes in 5 fluid ounces of hot water.  Microwave for 30 seconds if they are slow to dissolve
Add Mandarin Juice and the Mandarins to the dissolved Jelly
Make up to 16 fluid ounces with cold water or Ice Cubes if you want a quicker set 
Put in Fridge to half set. Put Tin of Evaporated milk in the Fridge
Check it now and then allowing it to
 half set ( still very wobbly but not completely set ) 

Whisk in 5 fluid ounces of Evaporated Milk until your Jelly is very frothy and bubbly
Put back in the Fridge and allow to set completely 
 Decorate with reserved whole pieces of Mandarin
Have fun decorating.  This Flower was my first attempt but I prefer the above Teddy Decoration
I hope you enjoy making Mum's refreshing Orange Airy Fairy and it becomes your Family Favourite too
Cheerio until next time. Marion x 

Saturday, 9 November 2013

How I made my cat a jumper bed Tutorial


Wally testing his new bed


Old wooly jumper


  Turn inside out and sew up neck opening


 Turn to right side.  Pin then sew across below arms 


  Stuff tube formed by arms and jumper top
I washed an old pillow at 60 degrees to clean it
 I cut it open and used the Stuffing for my Cat Bed 
  Folding back the arms makes this job easier to do


  Outer ring of bed now stuffed


Put one cuff inside the other to join circle
Pin, tack then oversew edge. Remove tacking stitches


 Put a small pillow or stuffing inside the jumper to make a base


Close hem and pull up thread to gather a little to round off


Turn over and pin base around edge


Oversew base to outer ring 


Complete.  Now I must find one of our four cats to test it !
Our Spaniel has tested it already  :-)


Sunday, 5 May 2013

TUTORIAL How to make a Powder Puff for applying Talc


I have just made this Powder Puff and thought you might like to see how I made it. 


Material list
Furry fabric
Fabric for the back. I used towelling for mine
Thick wadding
Ribbon
A saucer to drawer a round shape


Pin and tack ends of ribbon to the centre of the towelling circle
Only sew the ends of the ribbon down because.....
 To use the Puff you put your fingers under the ribbon
If you want a hanging loop turn the end under ( see lower photo )


Sew the small wadding circle onto the middle of the big wadding circle
This will keep your Puff plump and stop it sinking in the middle


Layer circles as above 
Ribbon side of towelling faces fluffy side of furry fabric
Place wadding circle under furry fabric circle


Pin around edge with the biggest pins you have
Sew around edge of circle about 1cm from the edge
 I did this by hand and left a gap for turning it inside out


Turn inside out and stitch opening closed and you have a nice fluffy Powder Puff for applying Talcum Powder.

Thursday, 16 February 2012

How to make a quick and easy carry cot for teddy


Here we go


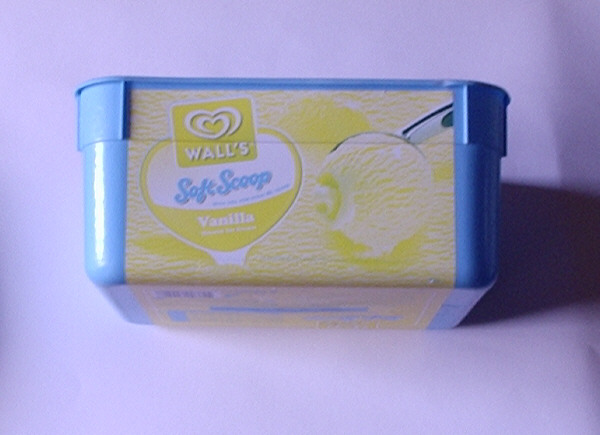
You will need an ice cream tub


and a shower cap


 Cut the ice cream tub below the rim as shown. and punch two holes ready for adding the handles.  I did this with a single hole punch. 


 Top view


Fit the shower cap over the ice cream tub and secure it with elastic.  When fitting nicely put some ribbon just above the elastic.  Sew or glue the ribbon in place then remove the elastic. 


Thread a large needle with ribbon. Feel for the punched holes and feed the needle through them to make handles as shown.  This should keep the shower cap in place


Put ted in his new carry cot. 
Now I just need to make him some bedding.......

Saturday, 9 July 2011

How to make a quick and easy cushion cover


Pick one large blouse or shirt. Do up all the buttons. Turn it inside out and iron it flat. Pin between each button to keep layers together.


Measure up to just below the armholes and draw a line across with a Trickmarker (fading fabric pen)  Pin along this line and along the bottom edge.


Draw a line at right angles to the line below the armholes on both sides creating a square or oblong. Pin and tack all around all four sides.


Remove all pins when you have finished tacking.  Sew around all four sides.  Trim fabric edge about 2 cms away from sewing line with pinking shears to prevent fraying. Cut diagonally across each corner to make corners easier to turn.


Undo buttons and turn to right side out.  Add a cushion pad. Do up the buttons and your cushion is finished.


Reverse of cushion with buttons done up and two useful hidden pockets to hide things in.  If you don't want the pockets simply remove them before making up your cushion.  You can also make a cushion the same way using a cardigan with buttons down the front for a cosy winter cushion.

Thursday, 7 July 2011

Recycled Basque is now a pretty useful bag

My husband bought me a lovely Basque.
Unfortunately it is the size I was when we first met when I was 15 years old......a long time ago ! 


A hour later it is now a pretty useful bag.


Marked with my Trickmarker fabric fading pen


Tacked, machined and edges pinked.  Ribbon added.


Finished bag.  I still have the leftover yards of ribbon, plastic bones and fabric to make something else. 

Thursday, 16 June 2011

Easy to make cover for a pack of pocket tissues


A very simple cover for a pack of pocket tissues
Turn fabric to wrong side and fold it around a packet of tissues
Hem the edges where they meet in the middle and sewn up ends
Turn to right side and add the packet of tissues
 The front opens up to remove a tissue

Wednesday, 25 May 2011

Recycling an old sock to make a soft comfy Eye Mask

  It gets light much too early for me here in the UK in May. I now put my sock eye mask on to cut out the light to help me sleep a bit longer. It works !

HOW TO MAKE AN EASY PEASY SOCK EYE MASK


Cut a piece out of heel to allow for turning inside out


Turn inside out and sew across the toe and across the top


Trim seam allowance to about 1cm


Thread elastic thread onto a large eyed needle.
 Push needle through the edge seam from the inside bottom left
Into the edge seam bottom right
Out at top right seam
Over and into top left seam
Adjust length of elastic to fit your head comfortably
Cut off at desired length and knot ends together inside sock


Close the opening at the back with a few small hand stitches
Your Eye Mask is now complete

Wednesday, 11 May 2011

How to make quick and easy felt flowers

These are very basic flowers that can be used to decorate many projects.
Cut a strip of felt and clip along edge.  Cut out a circle of felt


Gently press uncut edge onto the felt circle.  Leave to set for 10 to 15 minutes. (While you are making more ! )  Seperate petals when the glue has dried


Where they are firmly fixed to the base circle they are easy to attach to anything. Add centres to them or add leaves.  Have fun personalising them....enjoy !